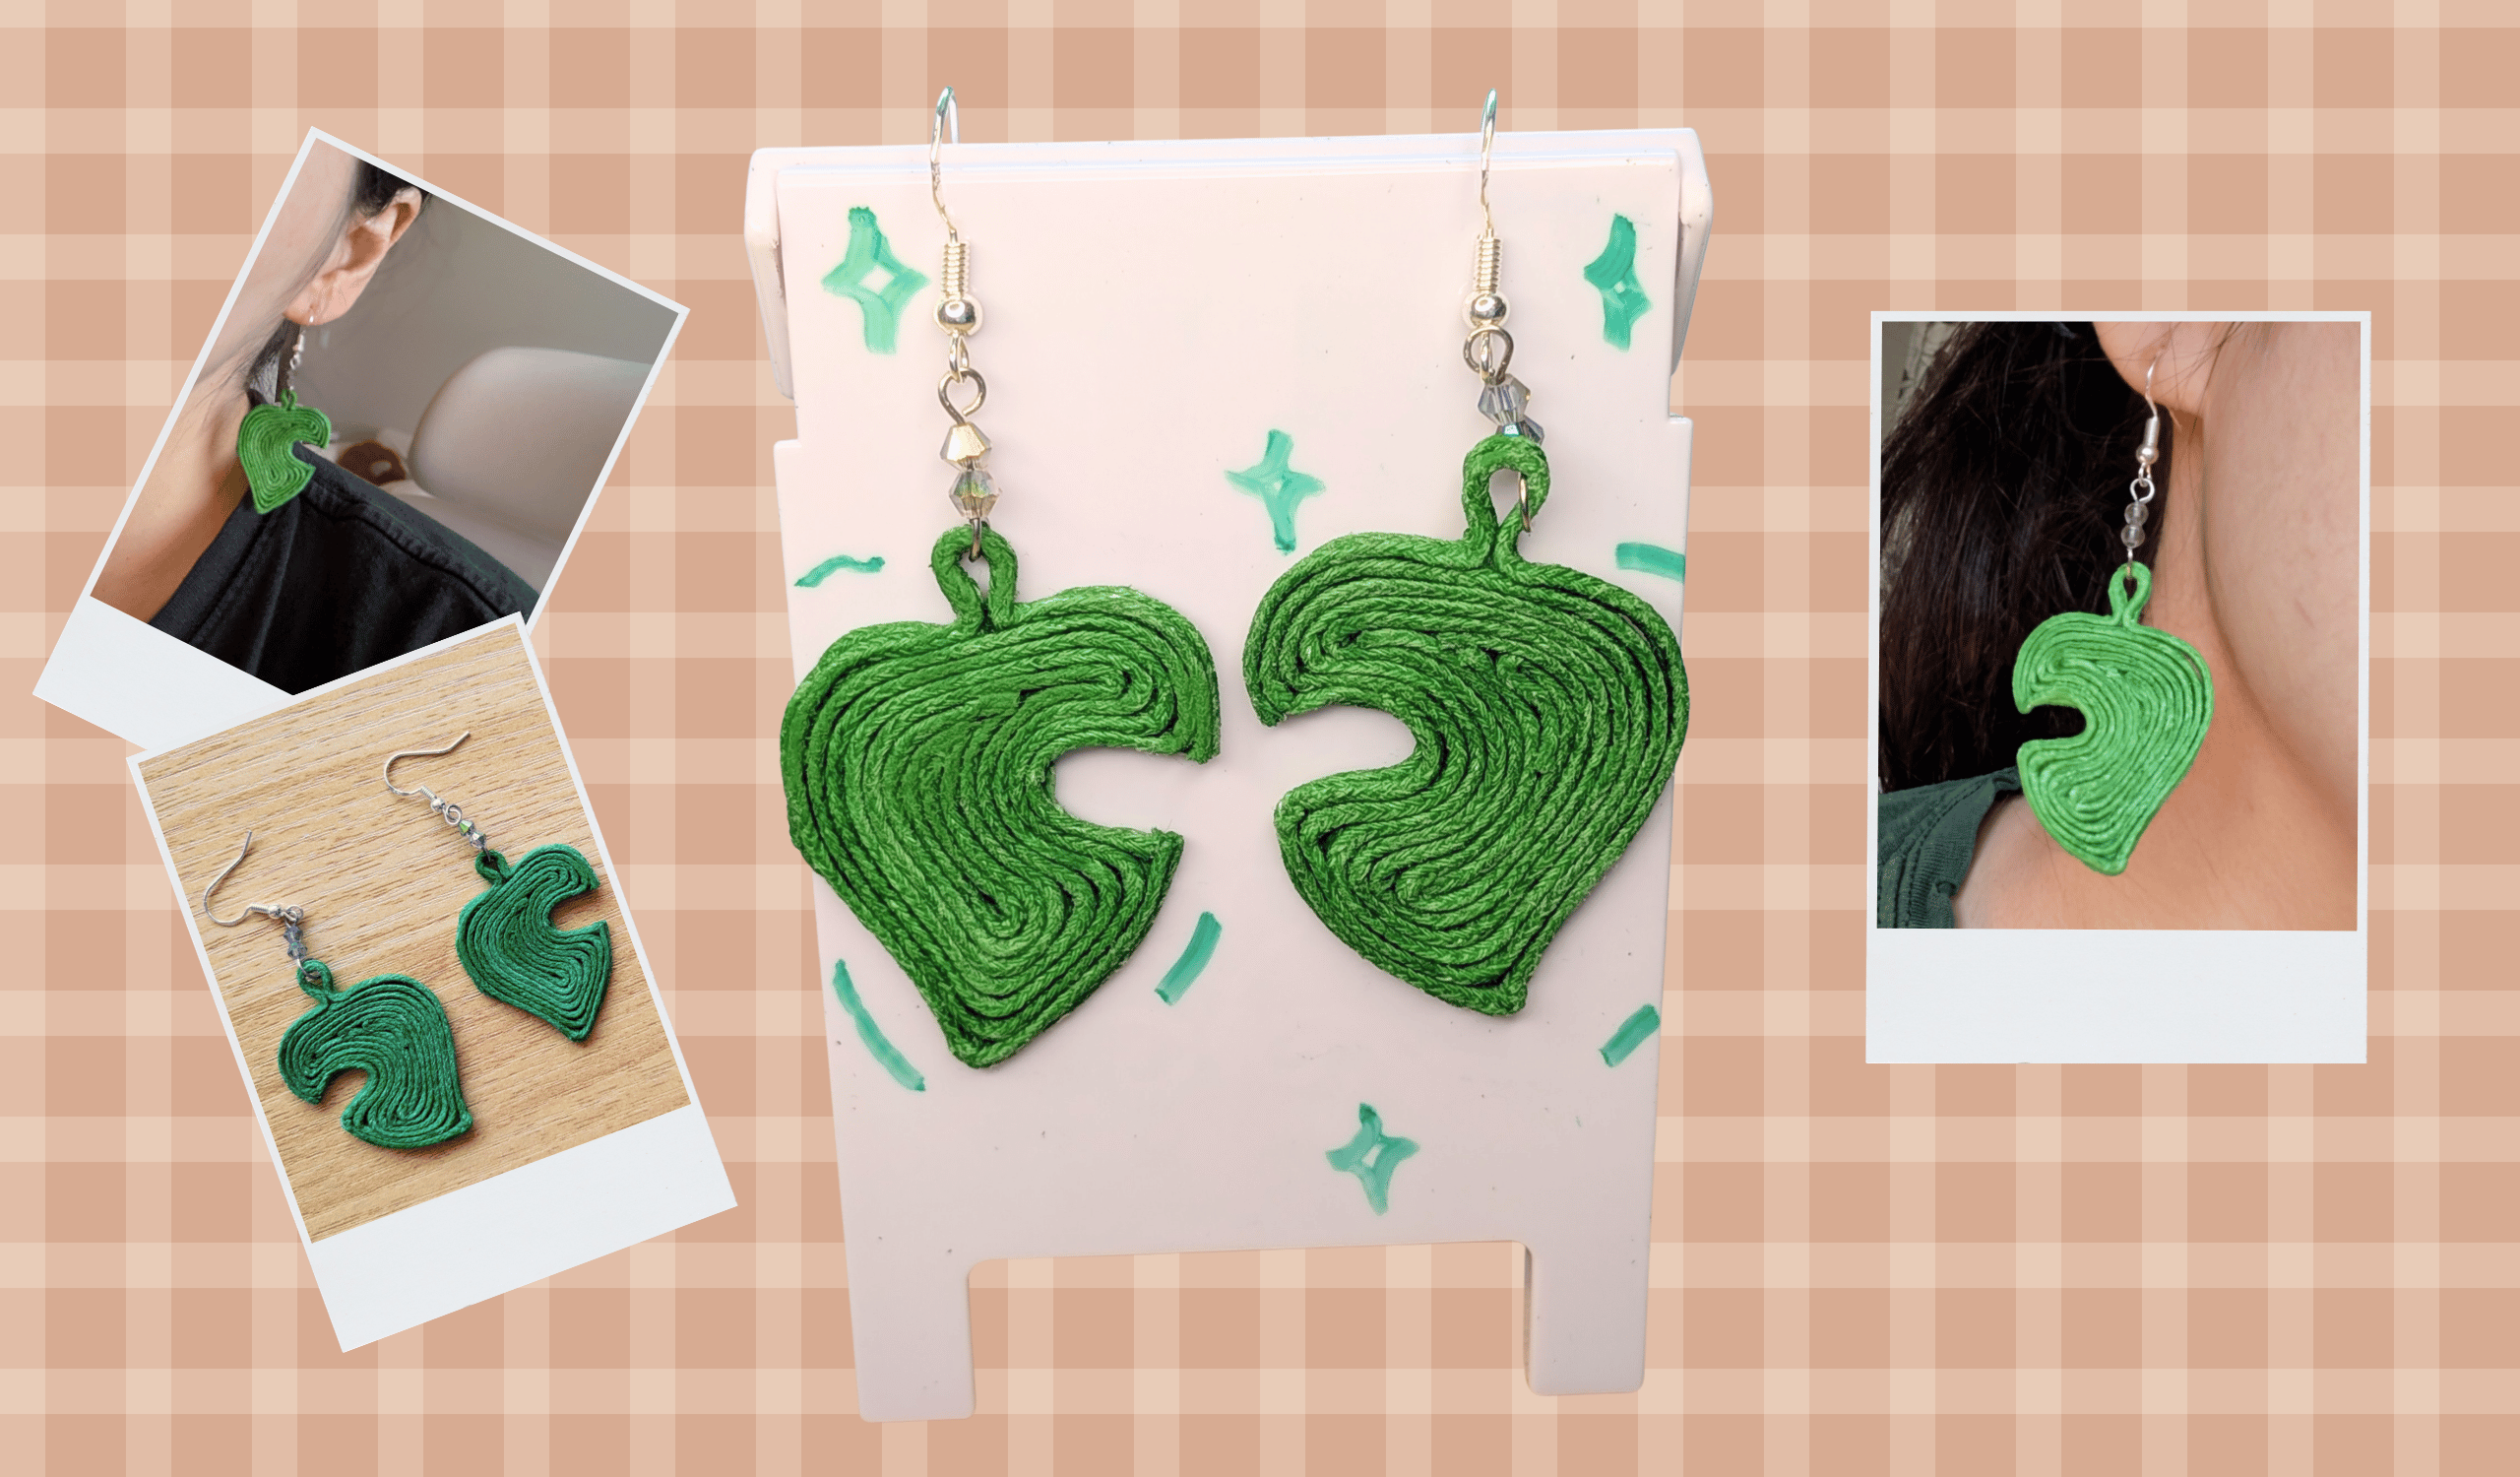
I got the inspiration for this craft from a pair of earrings I found on Cider. I wanted to see if I could figure out how to make them on my own.
But instead of copying the flower from Cider, I wanted something more personal. So, I ended up making the iconic Animal Crossing leaf. If you've been hunting for a handmade earring idea that feels a little different, this one is it.
What do you need to make cord earrings?
The product description said the original is made from paper. I'm not sure what type, but it looks like your average paper twine you'd use to wrap goodie bags or gifts.
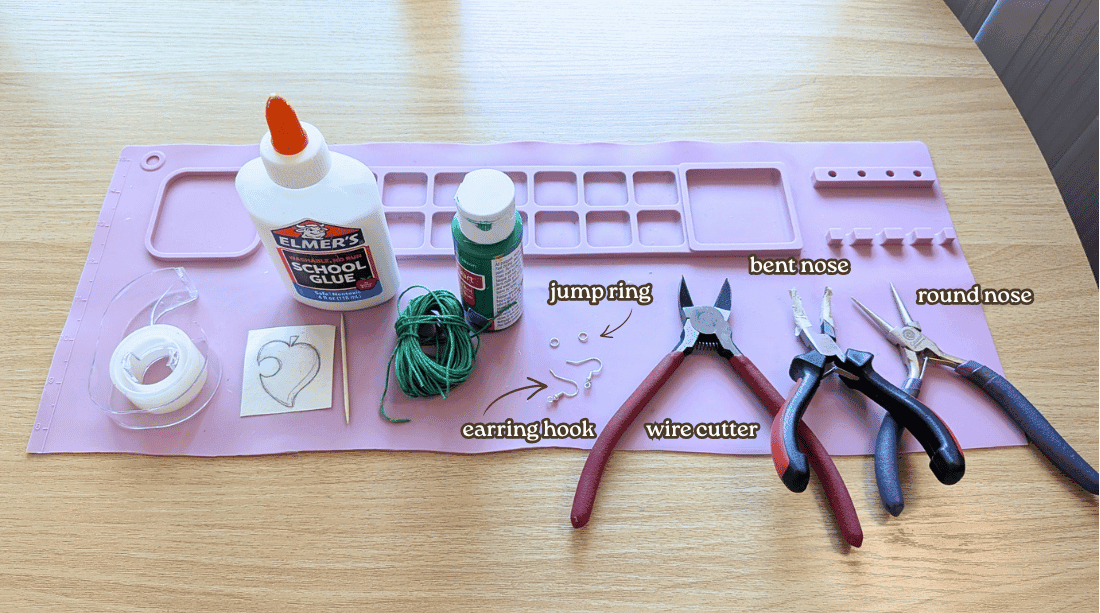
Materials:
1 mm cotton cord or paper twine
Elmer's glue
Clear tape
Paper drawing
Toothpick
Wire cutter or scissors
Standard jewelry pliers (round nose, flat nose, bent nose - ones that you need to open and close jump rings)
Optional:
Acrylic paint
Silicone mat
Step 1: Create/ Print out your design
Before you pick a design, think about the size you want. For this one, I freehand sketched the leaf, then layered tape over it until it was completely covered. Then, I held it up to my ear in the mirror to check if the sizing was what I wanted.
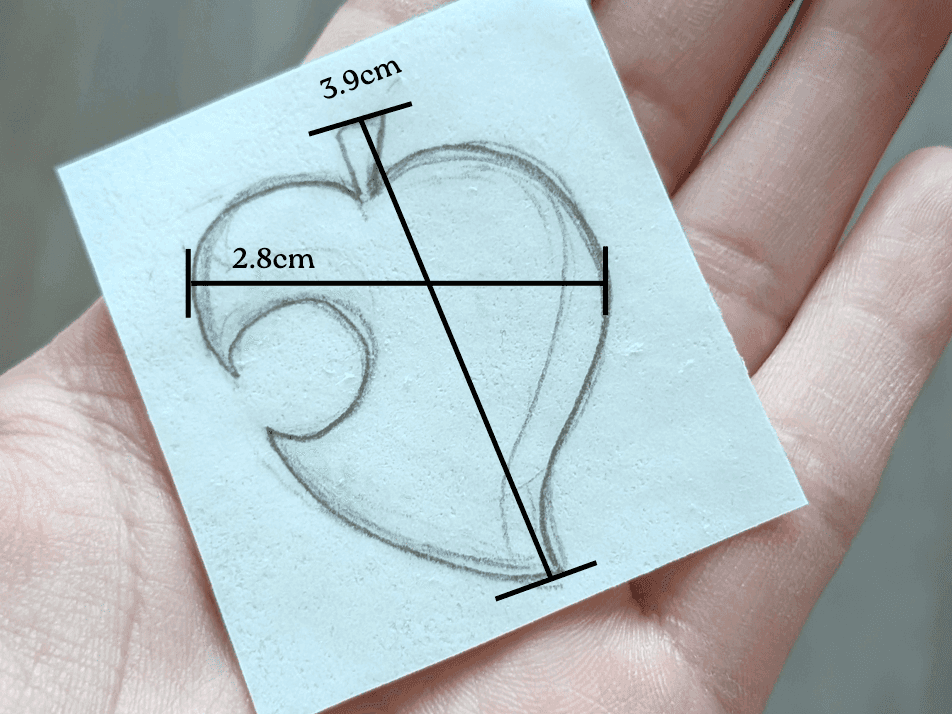
Once you're happy with the design, tape it onto the silicone mat. That way, it won't move around when you start gluing in the next step.
Step 2: Start Gluing
Grab your toothpick, cord, and glue. Before you start, decide which direction you want the cord to go. For example, a zigzag and a circular pattern that winds toward the center will give you very different looks. For my Animal Crossing leaf, I went with circular.
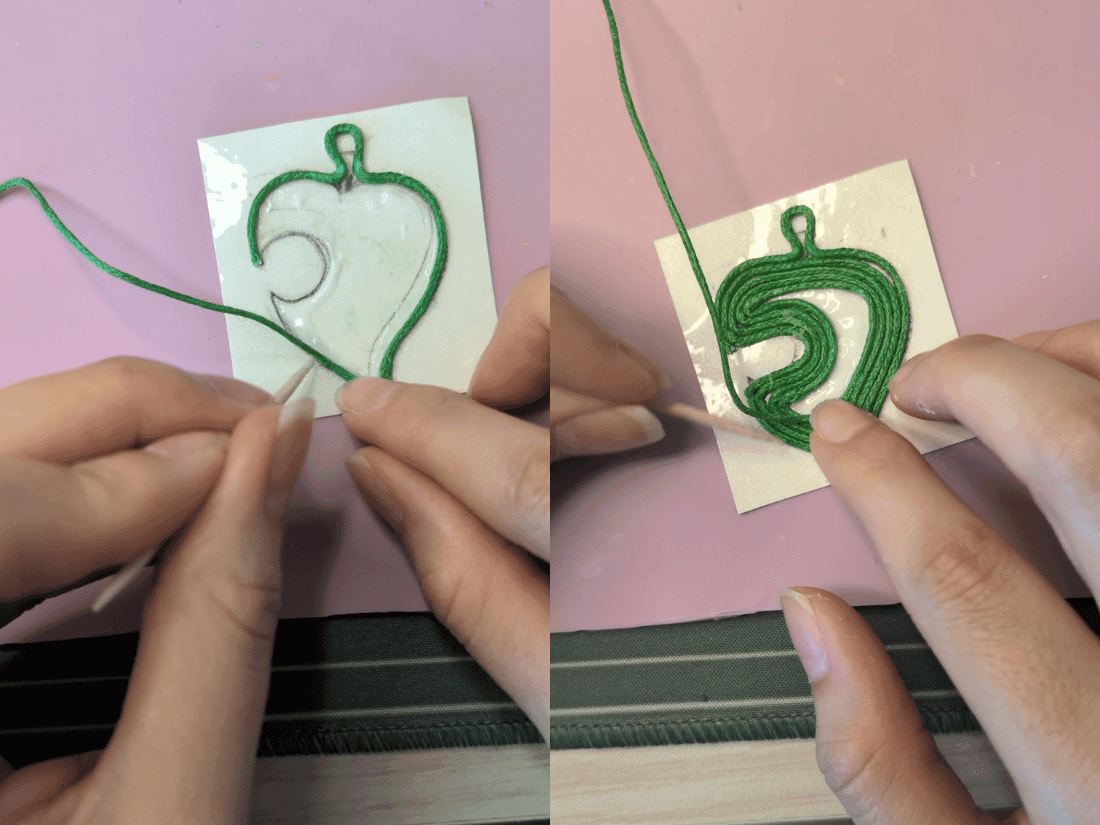
I started by adding a thin layer of glue along the edges of the design, then laid the cord down. For sharp turns, I press the toothpick onto the corner, then pinch the corner with my other hand and guide the cord around it. Then I wait a little for the glue to dry so nothing shifts as I keep going.
Make sure you leave room for your earring hook or jump ring to go through. With this leaf, I left an opening in the stem.
Once your design is fully covered, cut the cord with wire cutters or scissors. I used wire cutters because they gave a cleaner cut and didn't fray the end.
Step 3: Let it Dry, Flip it and Repeat
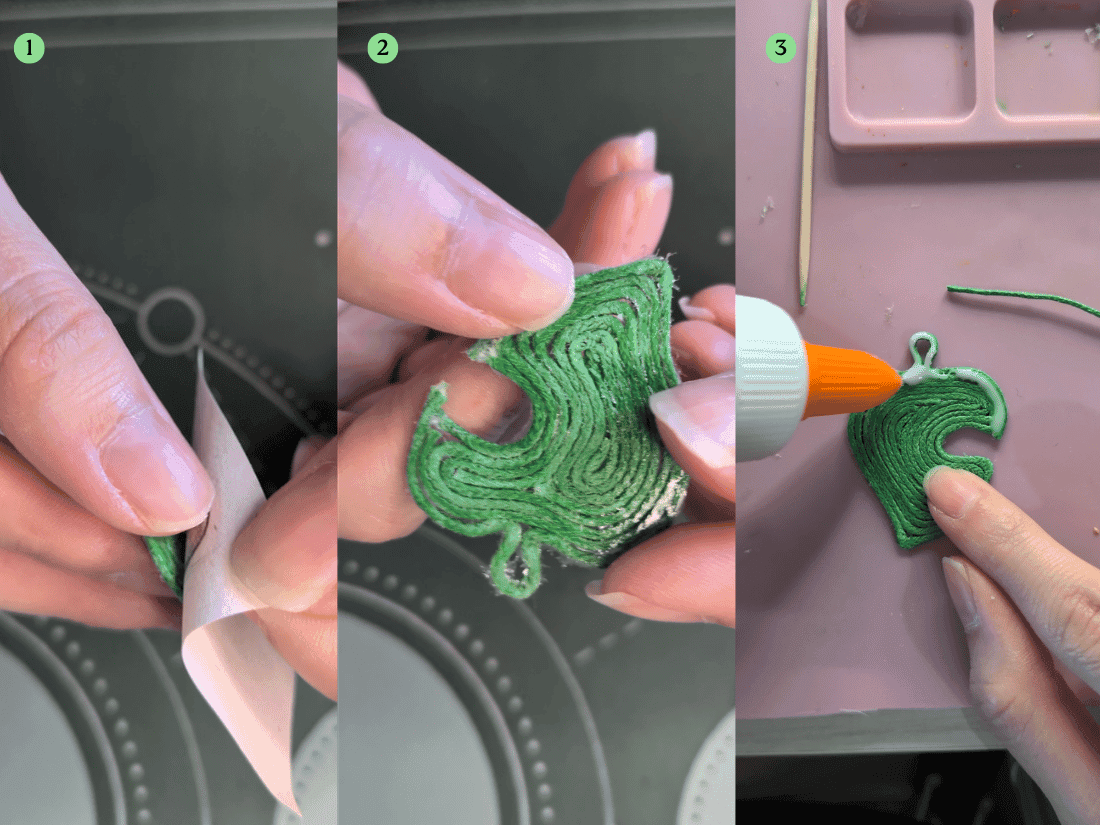
Let this side dry completely and make sure to press the piece to make sure it doesn’t warp as it dries. Then gently peel it off the tape. If you're happy with your piece as is, skip ahead to step 4; if not, flip it over. Gently scrape off any loose dried glue bits, then repeat Step 2 on the second side.
Step 4: Clean up
After the glue dries, check your work. You might spot glue residue or some discoloration from mild fraying.
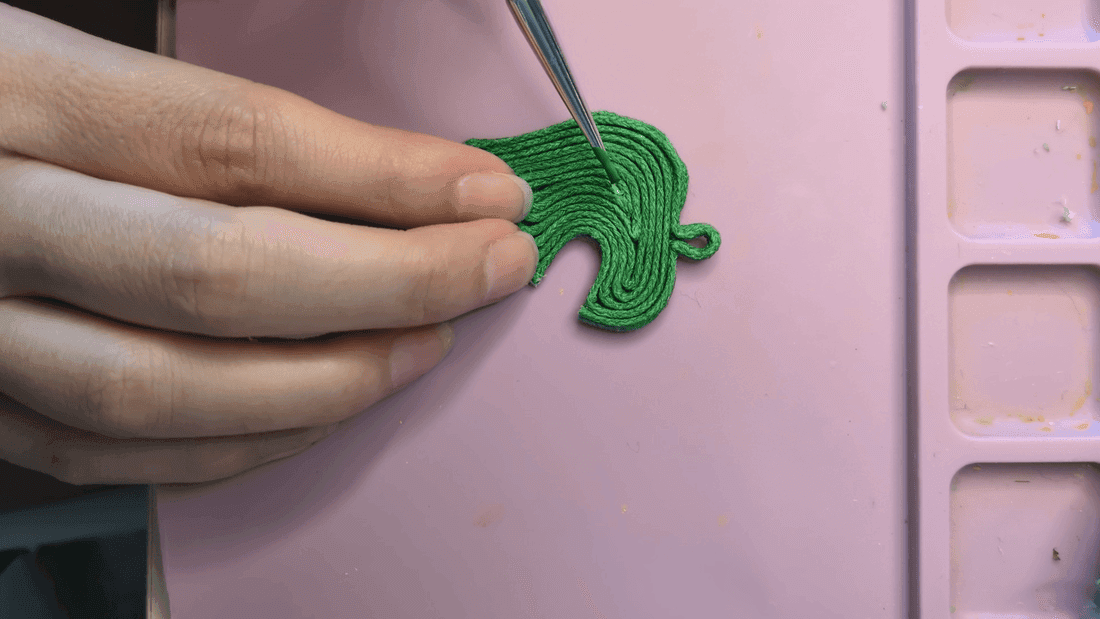
On this leaf, I painted over those spots with acrylic paint. I also used my wire cutters to snip a tiny piece off one edge that was sticking out from the design.
Step 5: Assemble Earring Piece
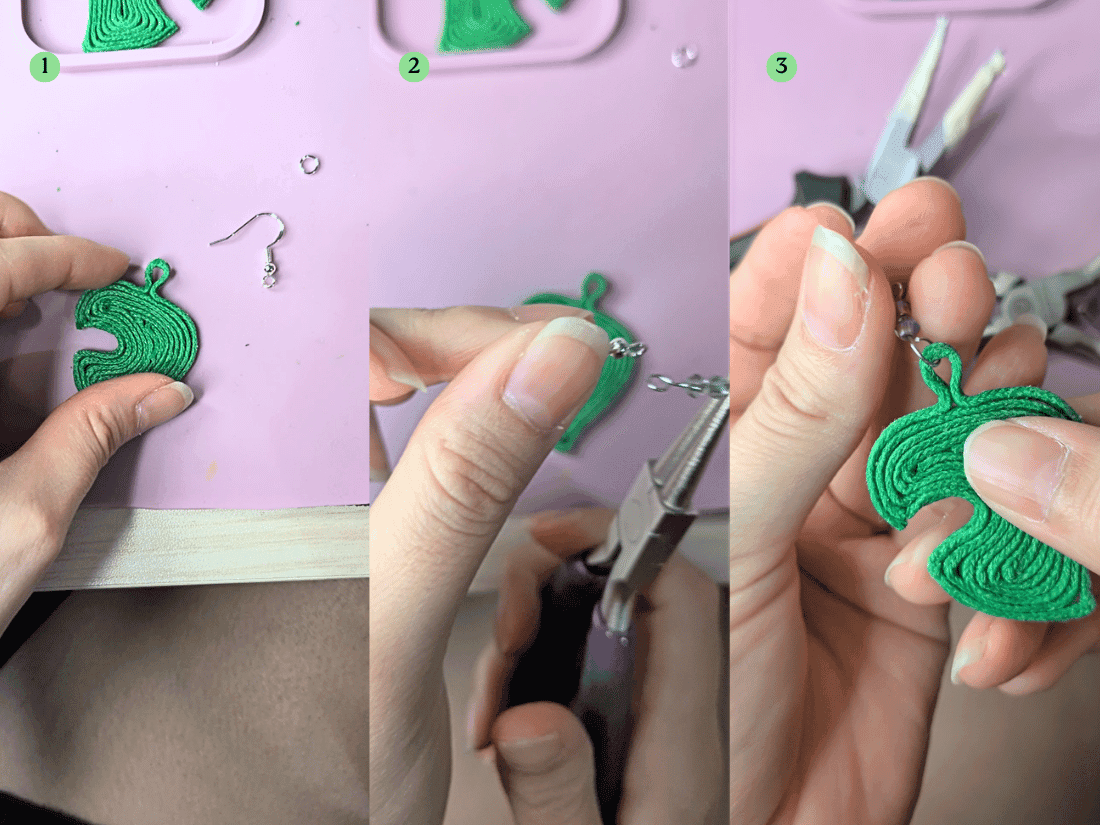
Now it's time for your earring hook. You will need to use your round nose plier and/or other jewerly plier for this step. If the chain loop (of the earring hook) is big enough to go through the opening you left, attach it directly. If not, grab a jump ring big enough to fit through the opening, then attach the earring hook to the jump ring.
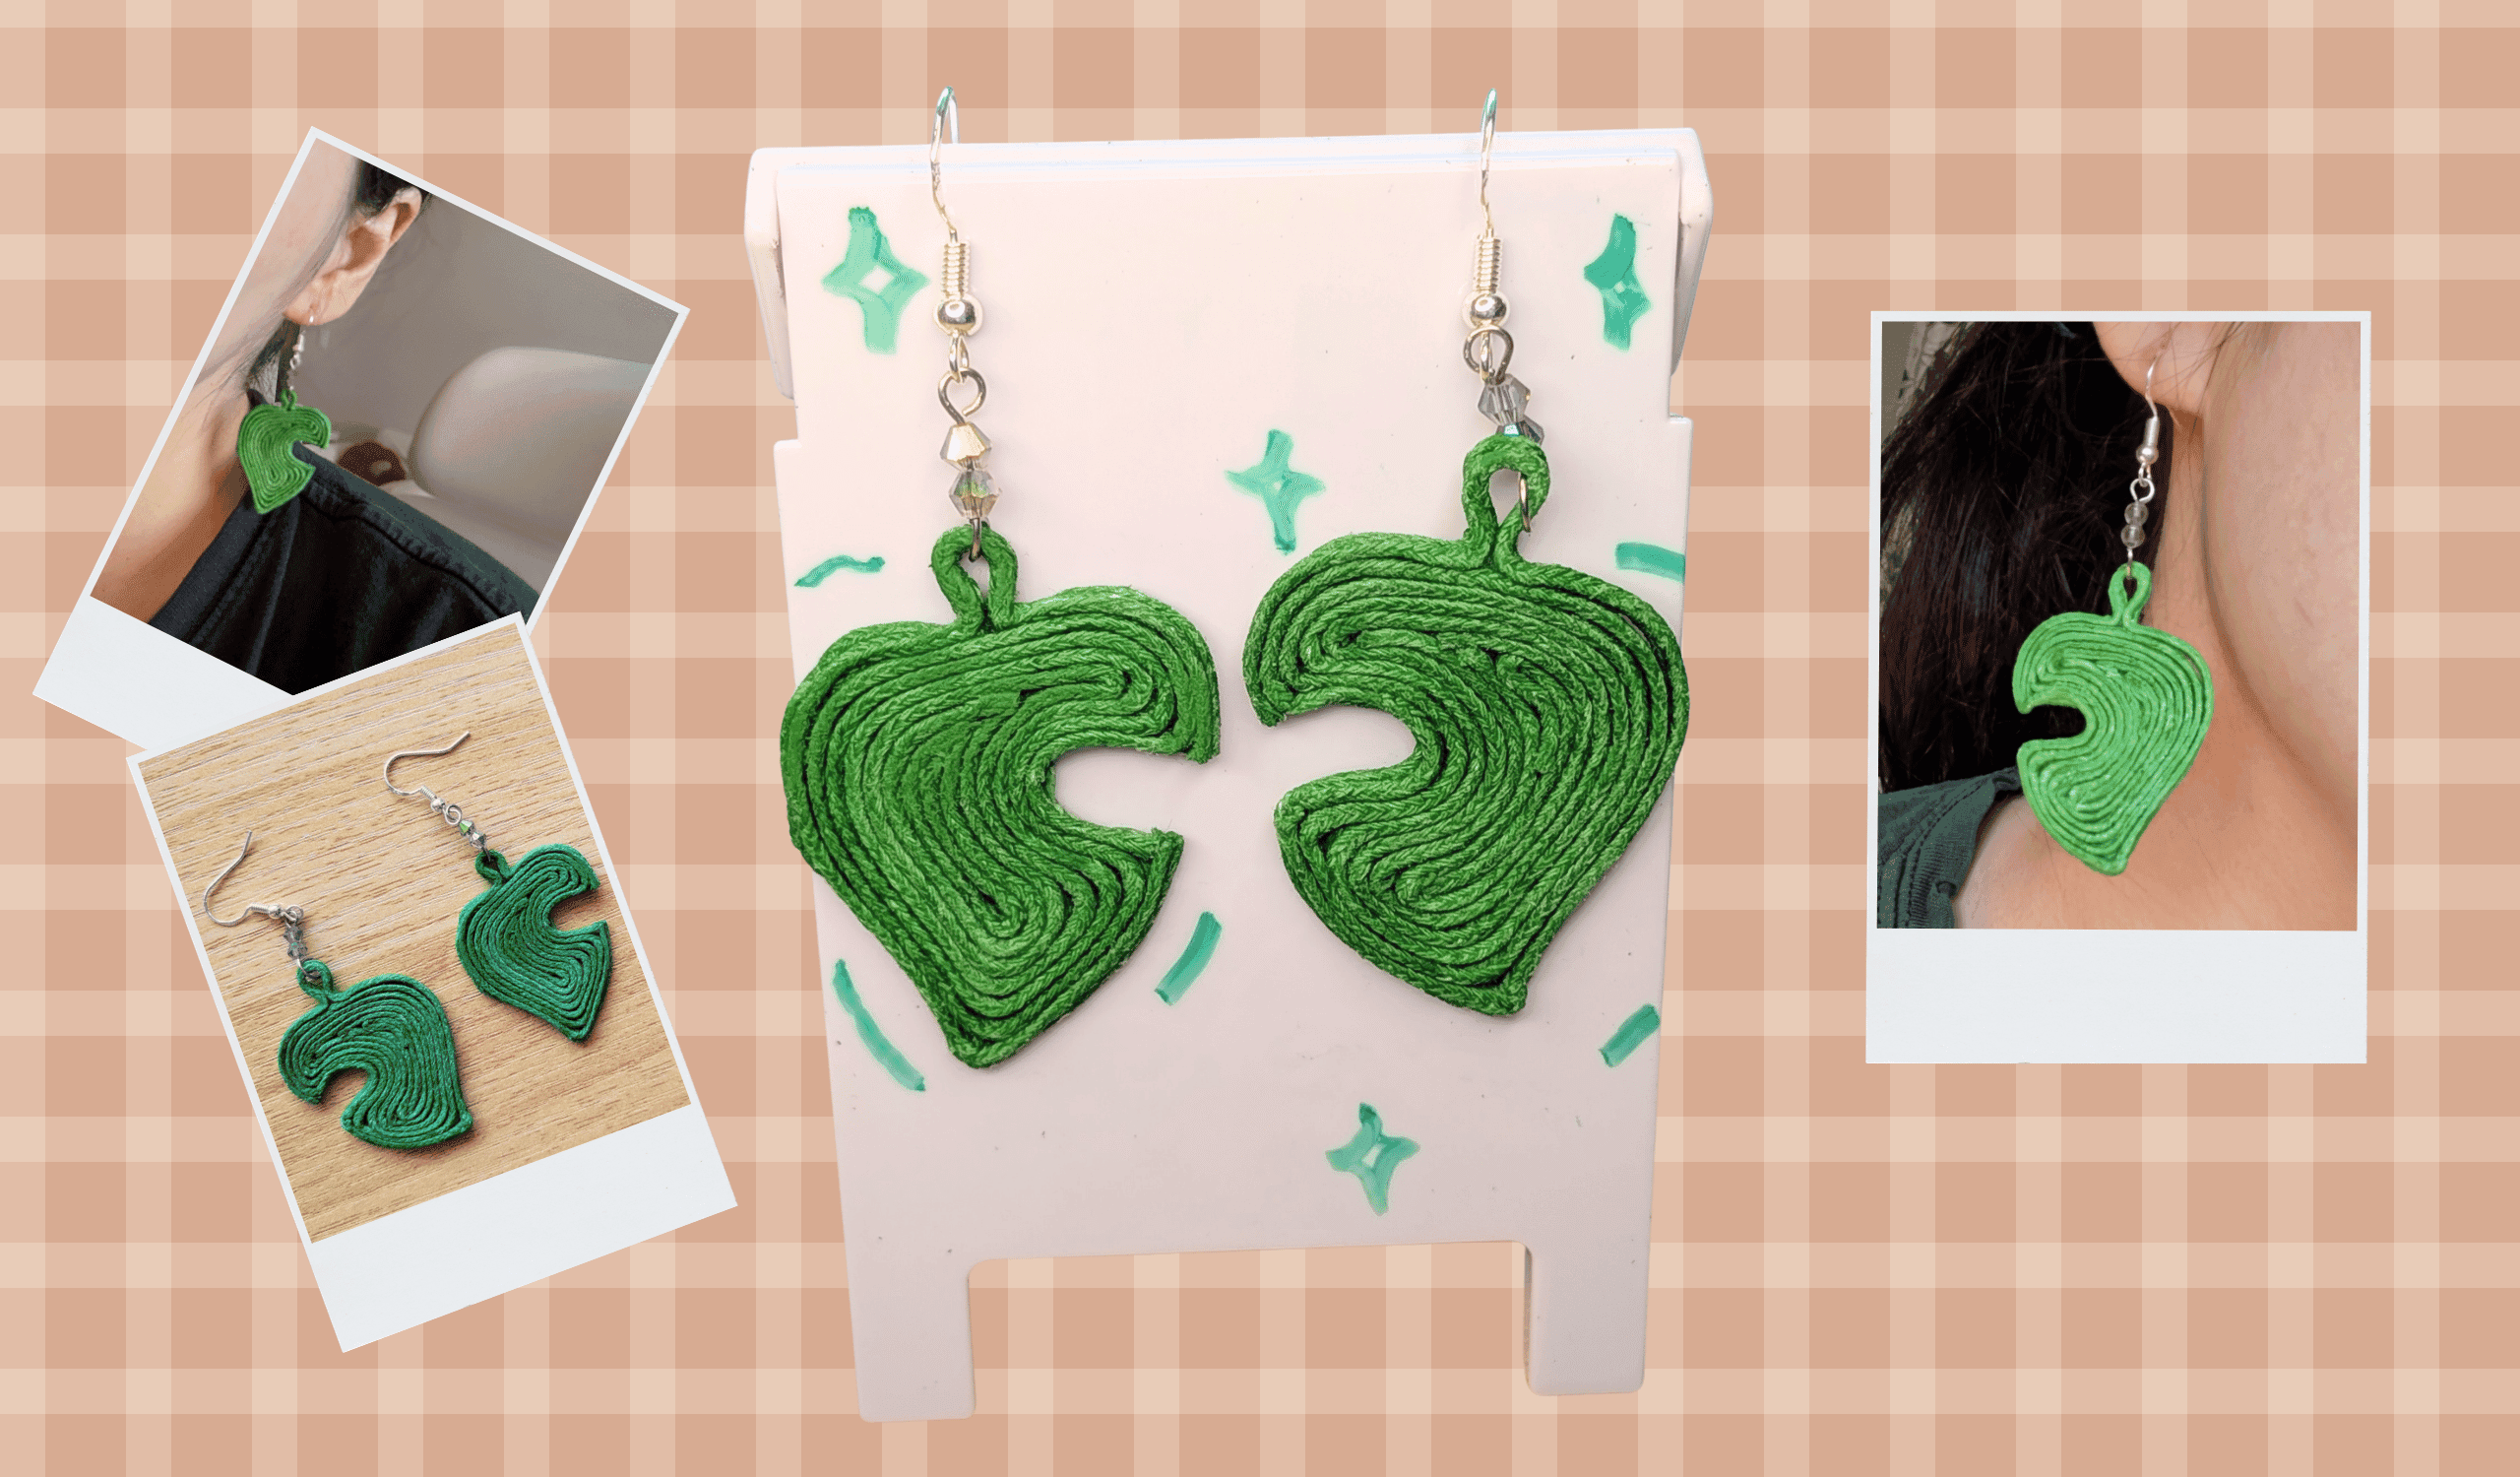
And presto, you're done! Just repeat steps 2-5 when creating the second copy of your pair of earrings.
Final Thoughts
This turned out to be an easy, budget friendly project, and a great activity for a cozy night in. I'd happily try this technique on other jewellery too. I can see it working for rings and even necklaces.
 If you enjoy twine crafts, this is a good starter project to test how different thicknesses behave.
FAQ
Why use cord string for DIY jewellery?
I wanted to test how different materials change the look of the final piece. I ended up using 1 mm cotton cord because it didn't unravel, and the thickness made it easy to shape.
Can I use embroidery floss instead?
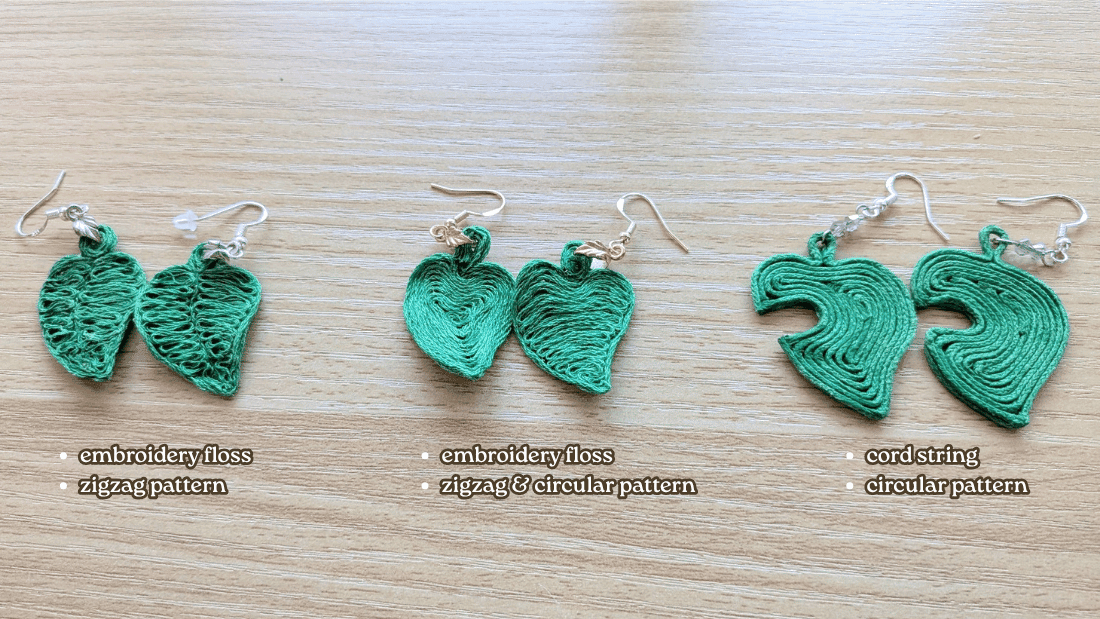
You definitely can, but it was harder to shape at times because floss unravels into its individual threads so easily. You also have to flatten it before it dries completely, or it will warp.
Below are regular leaf earrings I made using embroidery floss. You can see how unpolished they look next to the cord version.
Can I use different sizes of string?
I'd stick to around 1 mm, maybe 2 mm. Once you go bigger, you'll need to change the size of your design and the type of glue you use.
Can I use other painting materials instead of acrylic paint?
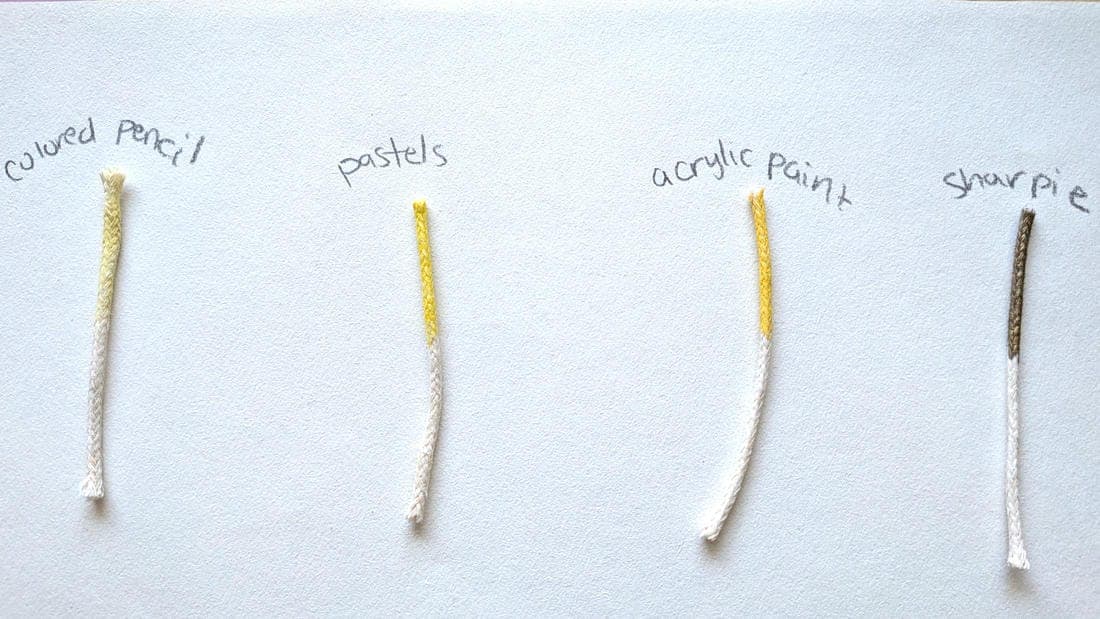 * tested different yellow coloring on white craft wax cord
Yes, the image above is a comparison of various coloring materials I’ve tested out. I personally liked using acrylic paint and pastels. With colored pencils, I had to apply a lot of pressure and repeated movements to get even this amount of color, which led to a little fraying on the string. With Sharpie, I used a gold Sharpie, and it turned out darker than if I used it on paper.