Introduction
There’s something so comforting about slowing down and making something by hand, especially when it brings warmth and charm into your home. I’ve been wanting to create something cute but also has a functional use for the home, and this toast utensil rest I found on We Round turned out to be the perfect solution. At the time, they sold out of these utensil rests, so I decided to make some myself 😀.
In this tutorial, I’ll show you how to make multiple-sized toast utensil rests using simple materials and beginner-friendly steps. It's a budget-friendly, cozy craft day item, perfect for adding a touch of Cottagecore magic to your space.
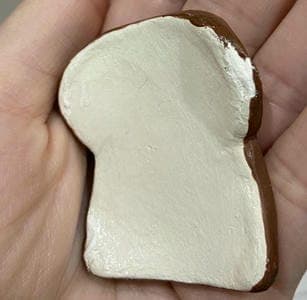
Finished Project

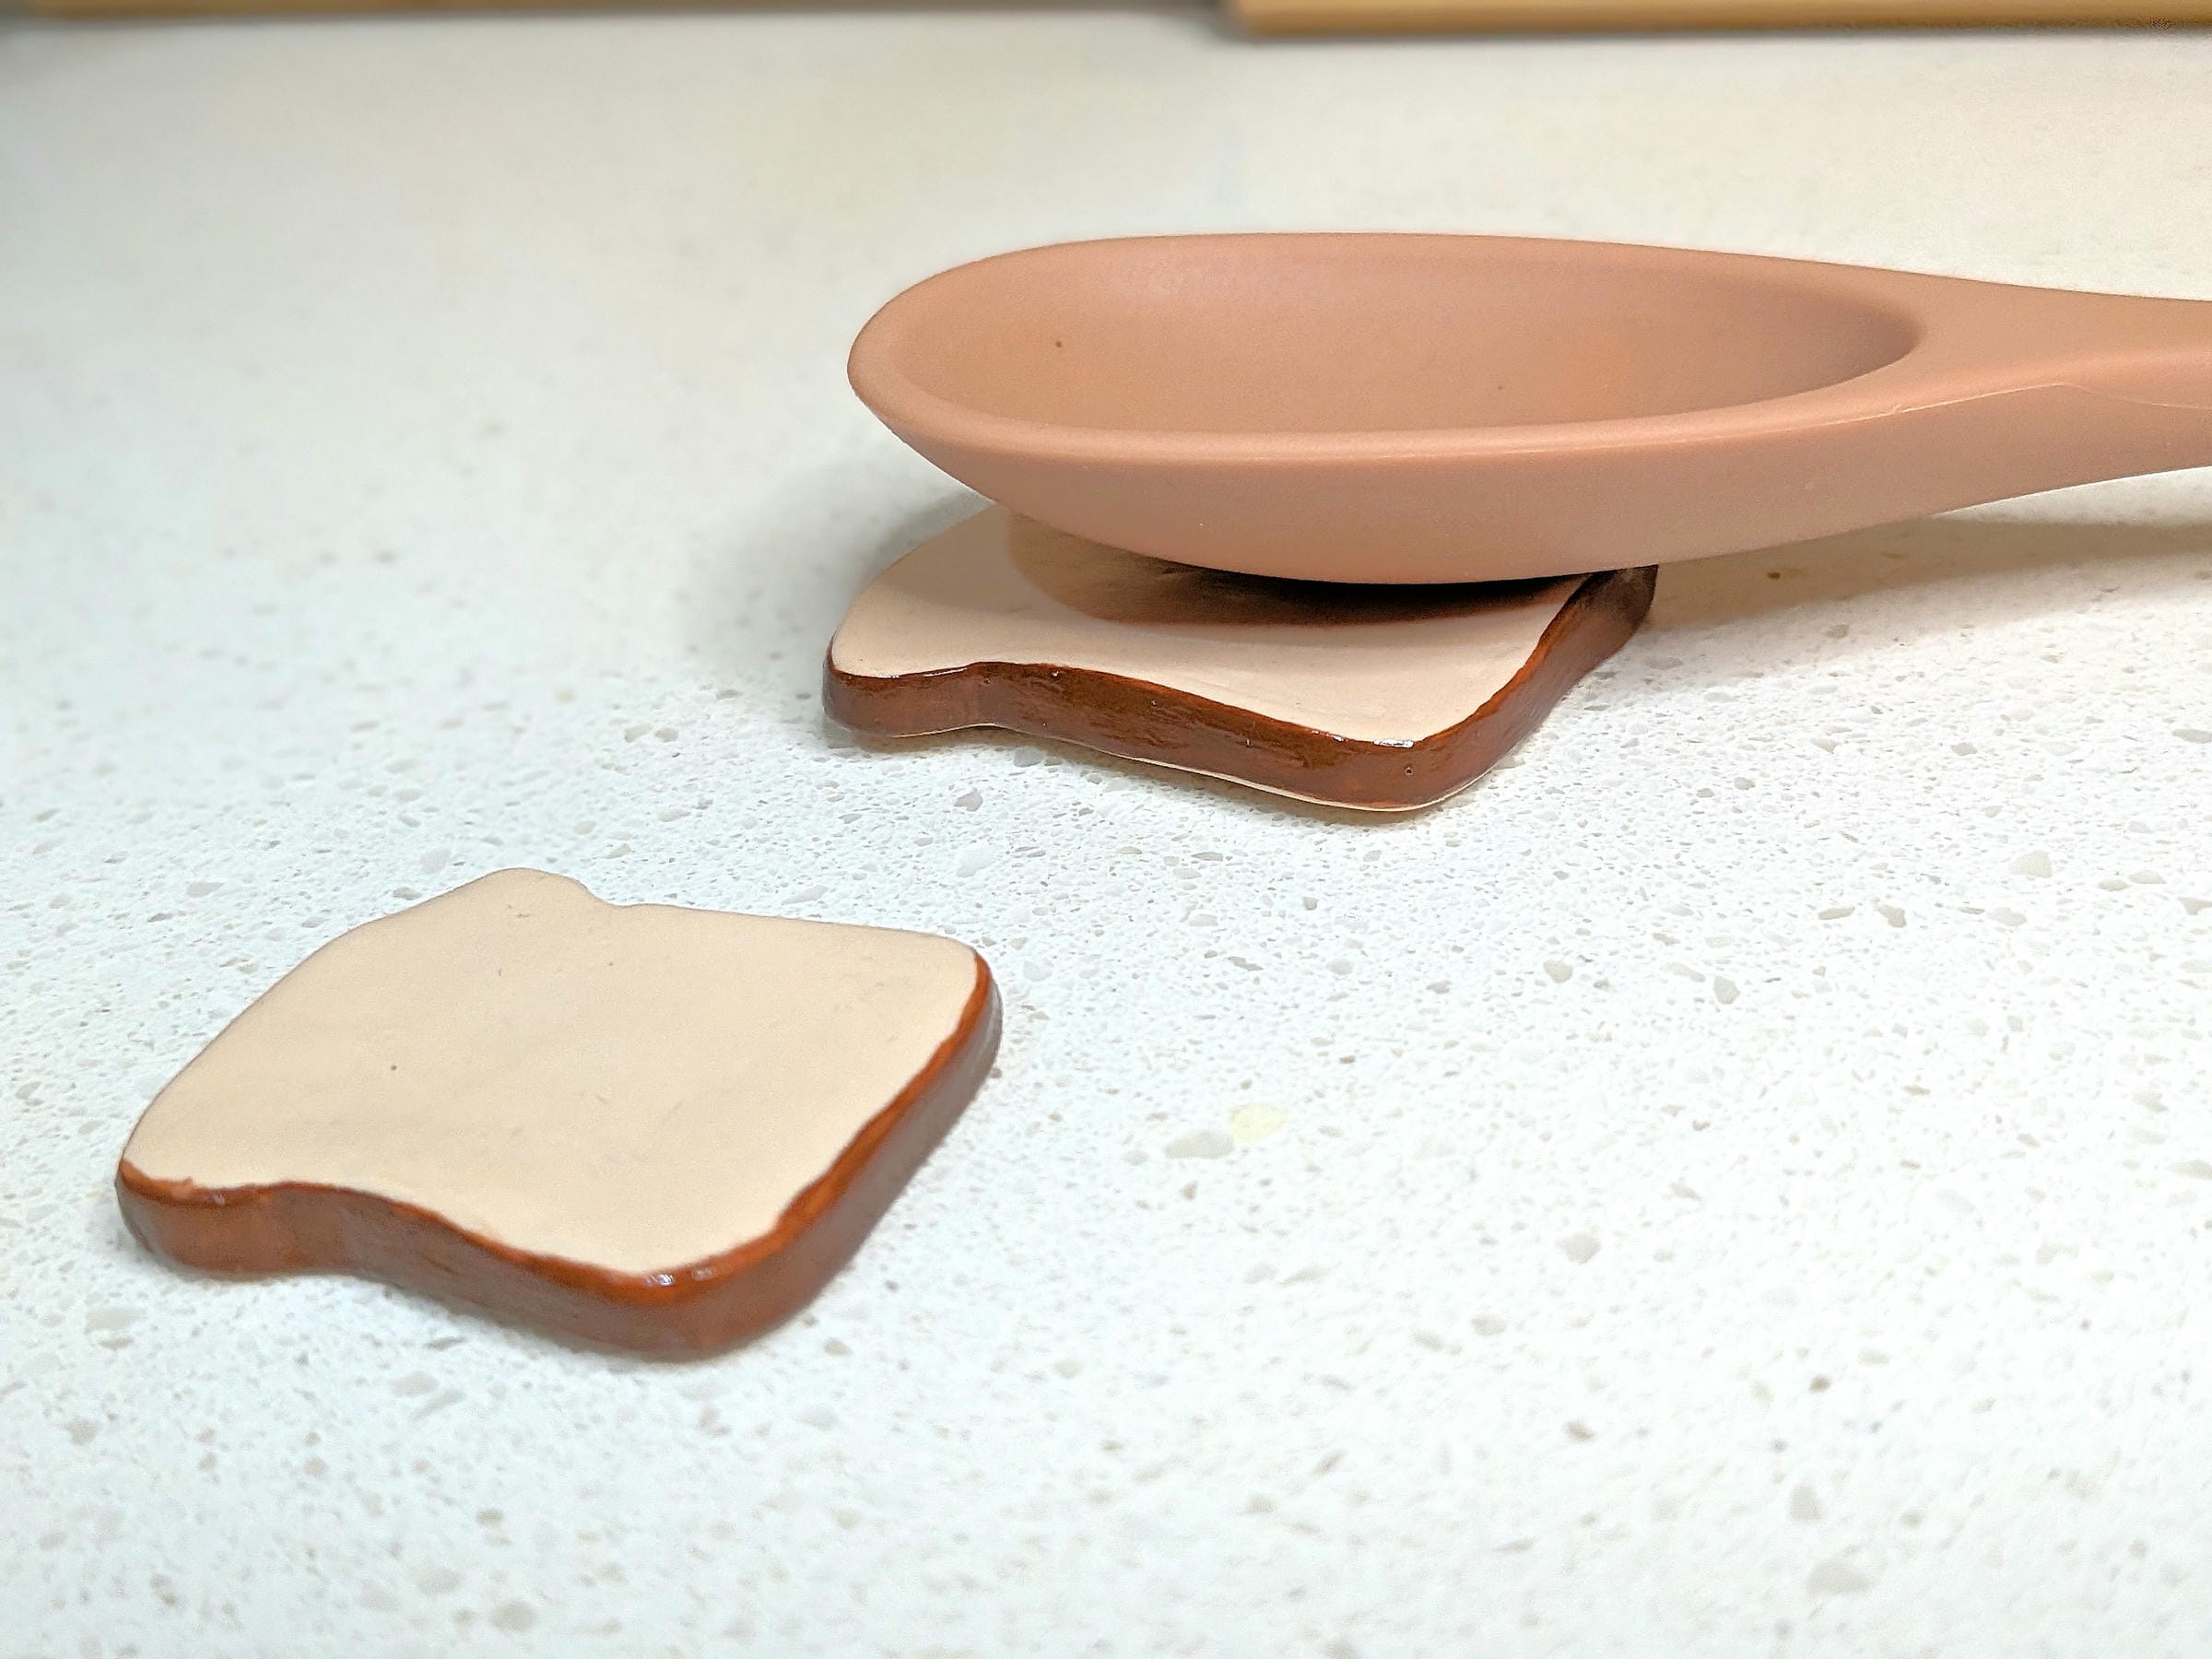
This is how the finished DIY Toast Utensil Rest looks once complete. I love how it adds a soft, handmade touch to the kitchen.
Overview
Skill Level: Beginner
Time Required: about 1 - 2 hours (including baking time)
Style: Rustic • Cottagecore • Handmade
Perfect For: Kitchen / Handmade gifts
Materials & Supplies
You’ll need:
Paper
Scissors
White or Cream Polymer clay* - about 25g
Exacto knife - or any precision knife tool
Baking paper
Rolling pin or plate to flatten your clay
Paint brush
Brown acrylic paint
Sandpaper - 600 grit or higher recommended
Optional:
Cornstarch
Rubbing alcohol
Step-by-Step Instructions
STEP 1: Create a Stencil

Let’s begin with making a stencil. Draw your toast shape in the size you want. For big utensils, I drew a toast shape about 1.75 inches by 1.75 inches. For small utensils like forks and spoons, I measured about 1.25 inches x 1.5 inches. Once done, pick your favorite ones and cut them out.
STEP 2: Setup
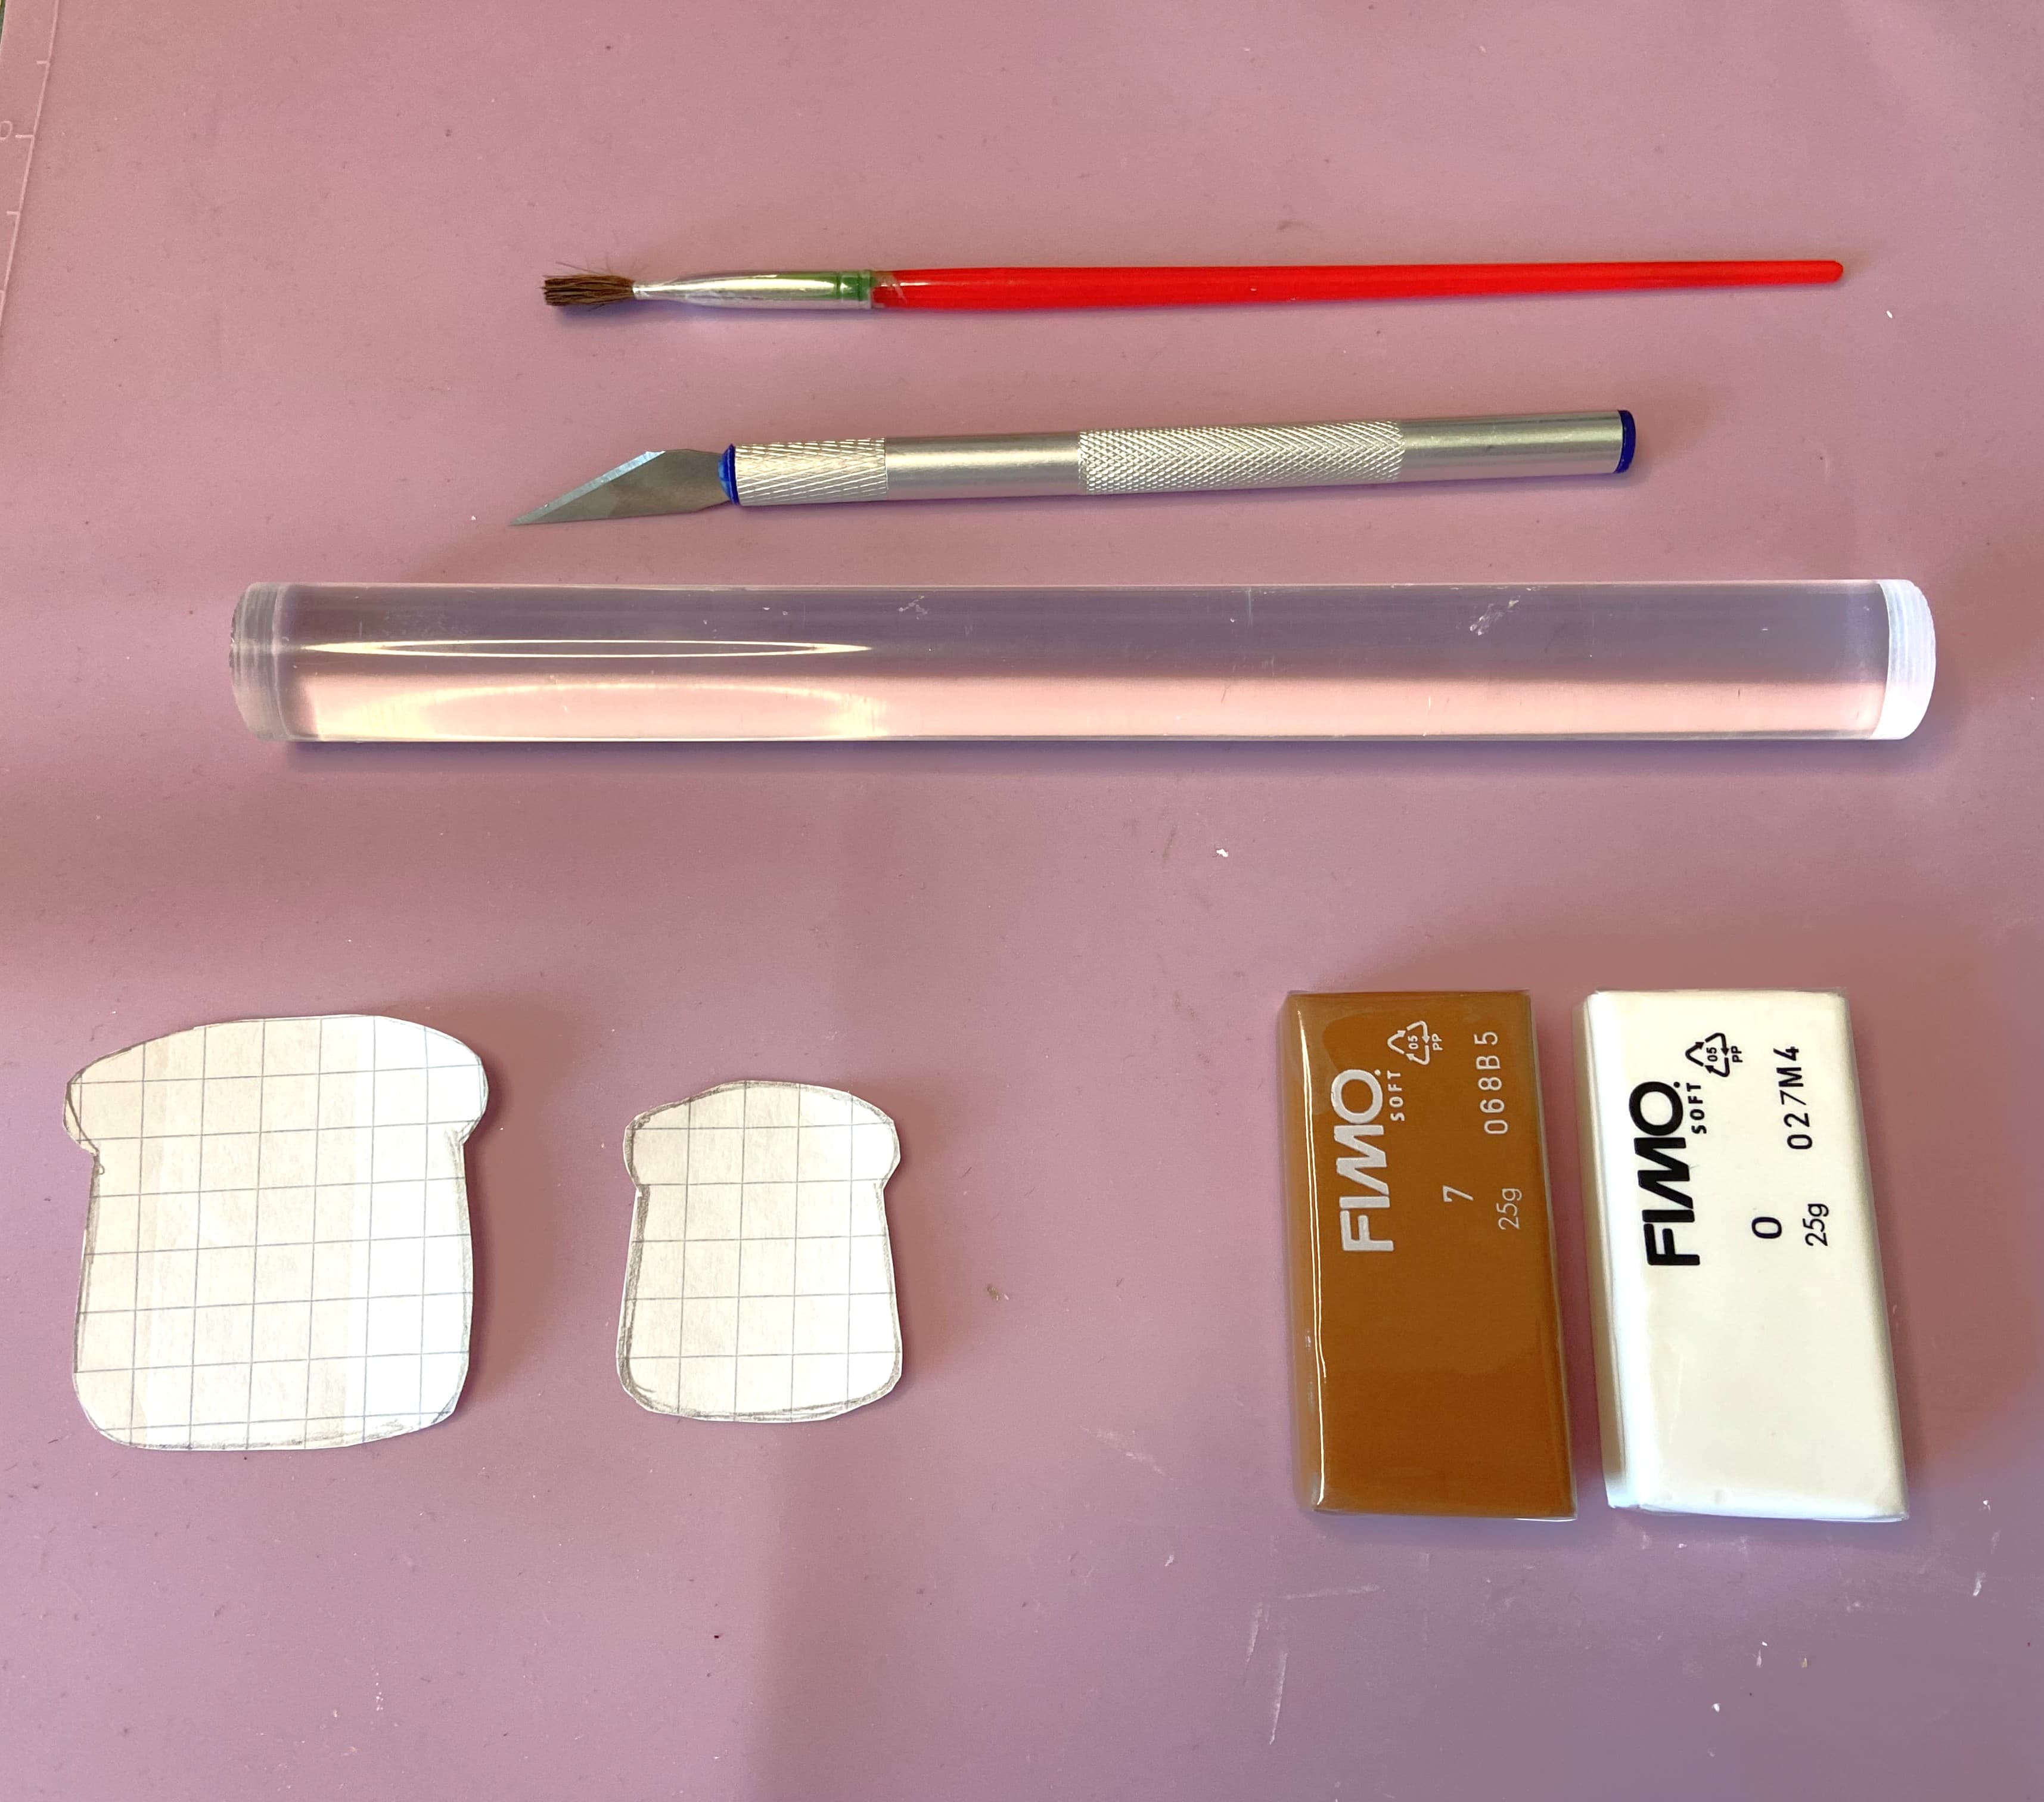
Time to set up your workstation, use a placemat (I used this purple silicon mat), an Exacto knife, clay, cornstarch, rolling pin, and stencil. Then mix a little brown clay into the white clay to make it more of an off-white/cream color of bread.
STEP 3: Shape The Clay
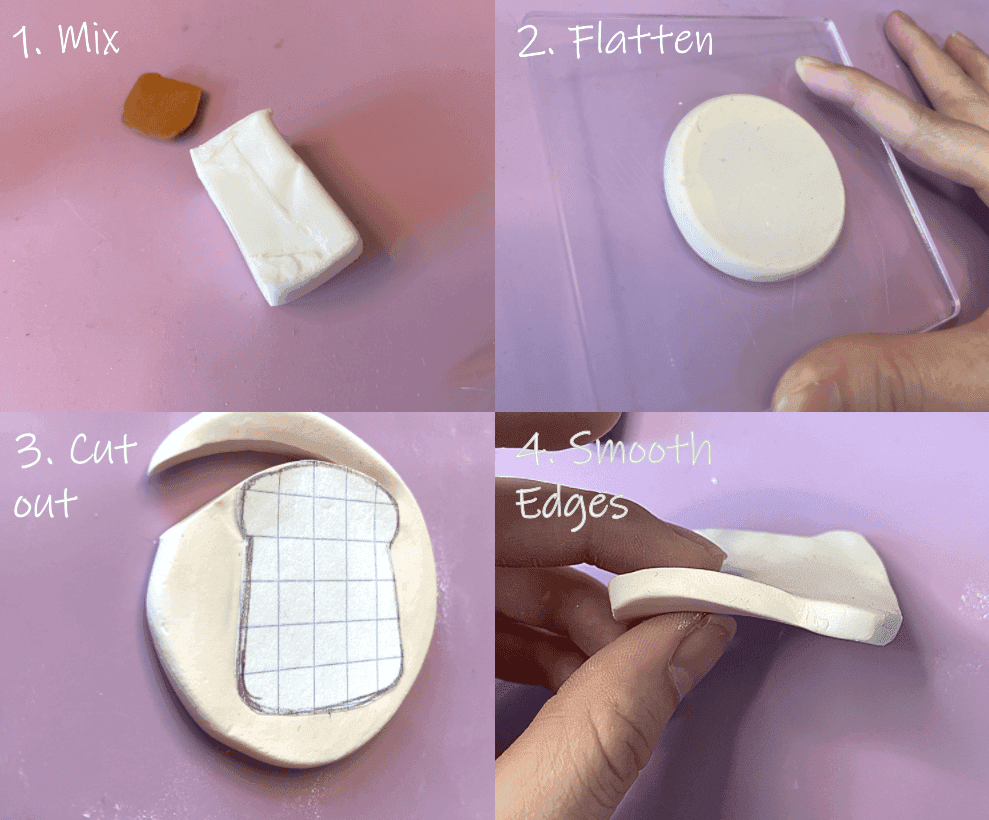
Time to shape the clay into a ball and start flattening! Use a rolling pin or plate to press it down flat until you get to a desired thickness. For the utensil rest, I made mine just under 1/4 inch thick. Make sure it's wide enough for both stencils to cover the clay completely.
Afterwards, use your knife to cut around the stencils. It will be jagged afterwards, so smooth out along the outside of the clay with your fingers. Once you have your toast shape, you can also modify it to give it a slight bowl-like shape (like in the We Round utensil rests). I preferred keeping them flat, but, unless I’m using these for circular utensils like chopsticks, then I would round up the edges, so it will prevent the chopsticks from rolling off.
STEP 4: Time to Bake
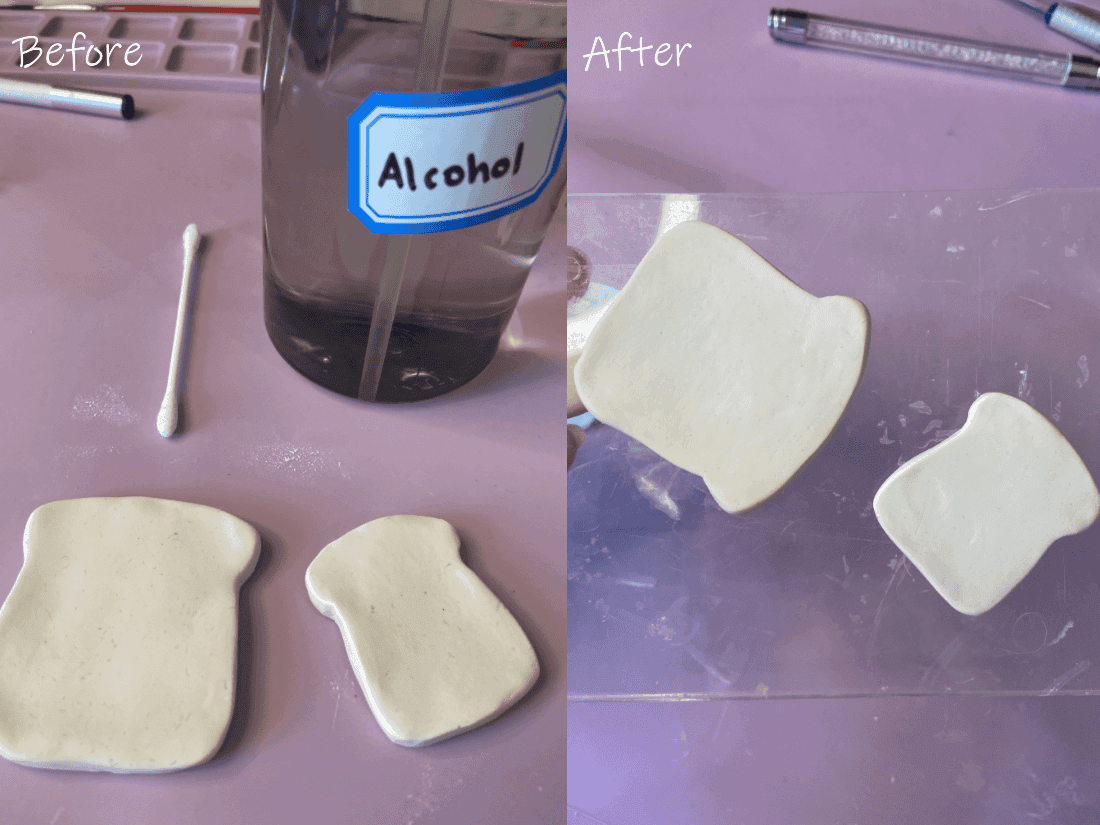
Before baking, If you see any dust particles on your clay, dab the area with a Q-tip dipped with rubbing alcohol and then lay it on parchment paper to bake. Please follow your clay packaging instructions for baking, for this Fimo clay, it was about 30 min at 230°F.
STEP 5: Paint and finishing details
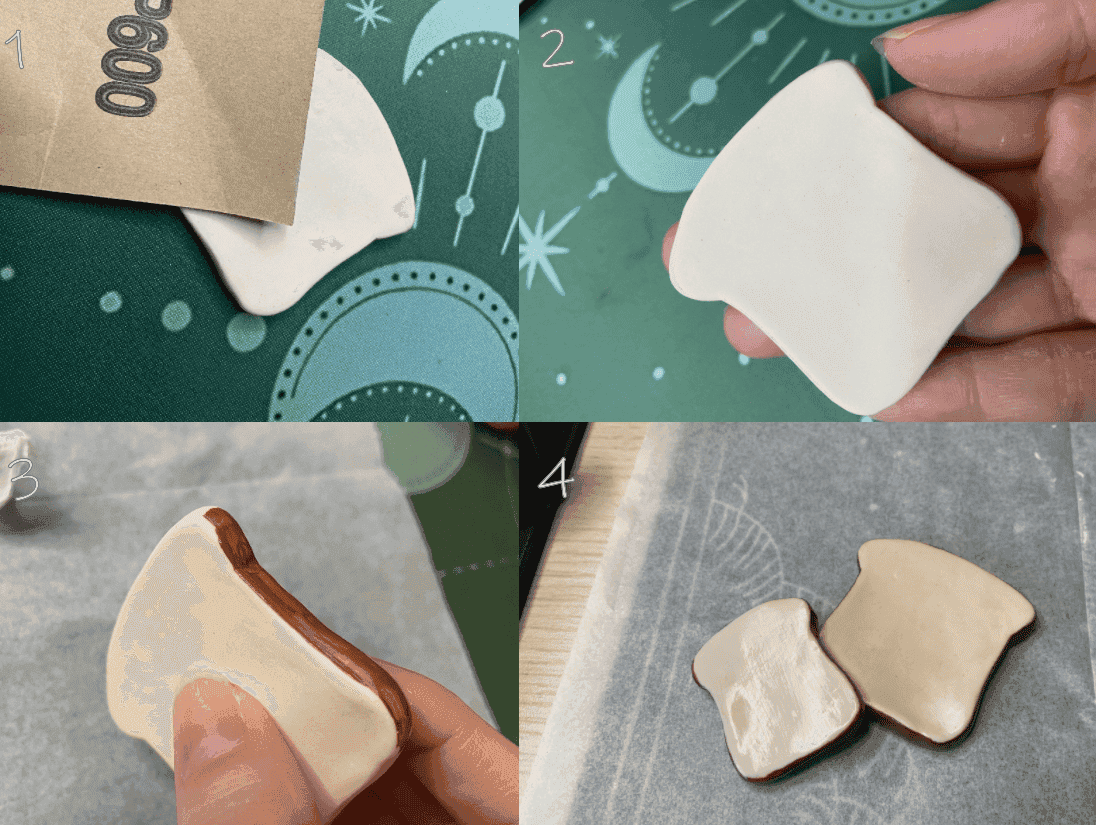
Once it cools down, you can use that sanding paper to smooth out uneven surfaces and remove any dust, if there's any. After, take your brown paint and start to carefully paint the edges. I used a damp Q-tip with water to clean up any mistakes. When it finally dries, for longevity, apply a couple of coats of varnish and let it dry completely before you use them. And that's it! Remember, handmade projects don’t need to be perfect because the charm is in the details.
Variations:
Change the color palette.
Use different textures or add “toppings” to your toast.
FAQs
Can I make this without varnish?
You can, but the painted parts might come off eventually.
Can I use something else besides polymer clay?
Yes, you can use air dry clay instead, but when you wash it, dry it right away. Extended wet exposure will start to melt off the utensil rest, as shown in the image below.
Can I wash this in the dishwasher?
No, I’d recommend not putting it in the dishwasher. Only handwash this craft item. The heat and strong detergents will most likely scratch the product. Make sure you also dry these off; you don’t want to leave them wet.
Final Thoughts
This DIY Bread Utensil rest is such a lovely way to slow down and bring a bit of cozy charm into your home. Whether you’re crafting on a quiet afternoon or making something special for someone you love, I hope this project brings you as much joy as it brought me. And if you don’t have the time to make it yourself, here are other DIY inspo, and products that are similar that you can buy directly from:
https://www.urbanoutfitters.com/shop/toaster-coaster-set-of-4
https://weroundshop.com/products/bread-spoon-rest- the inspiration for this DIY craft